When you first install Lightroom 6/CC you may find yourself asking "Wait, how is this different from Lightroom 5?", which is to say it's an easy upgrade and familiar on all counts. But as you use it you'll notice lots of meaningful new features everywhere – some small and some big. Here are five things in LR6/CC that I find significant:
Photo Merge
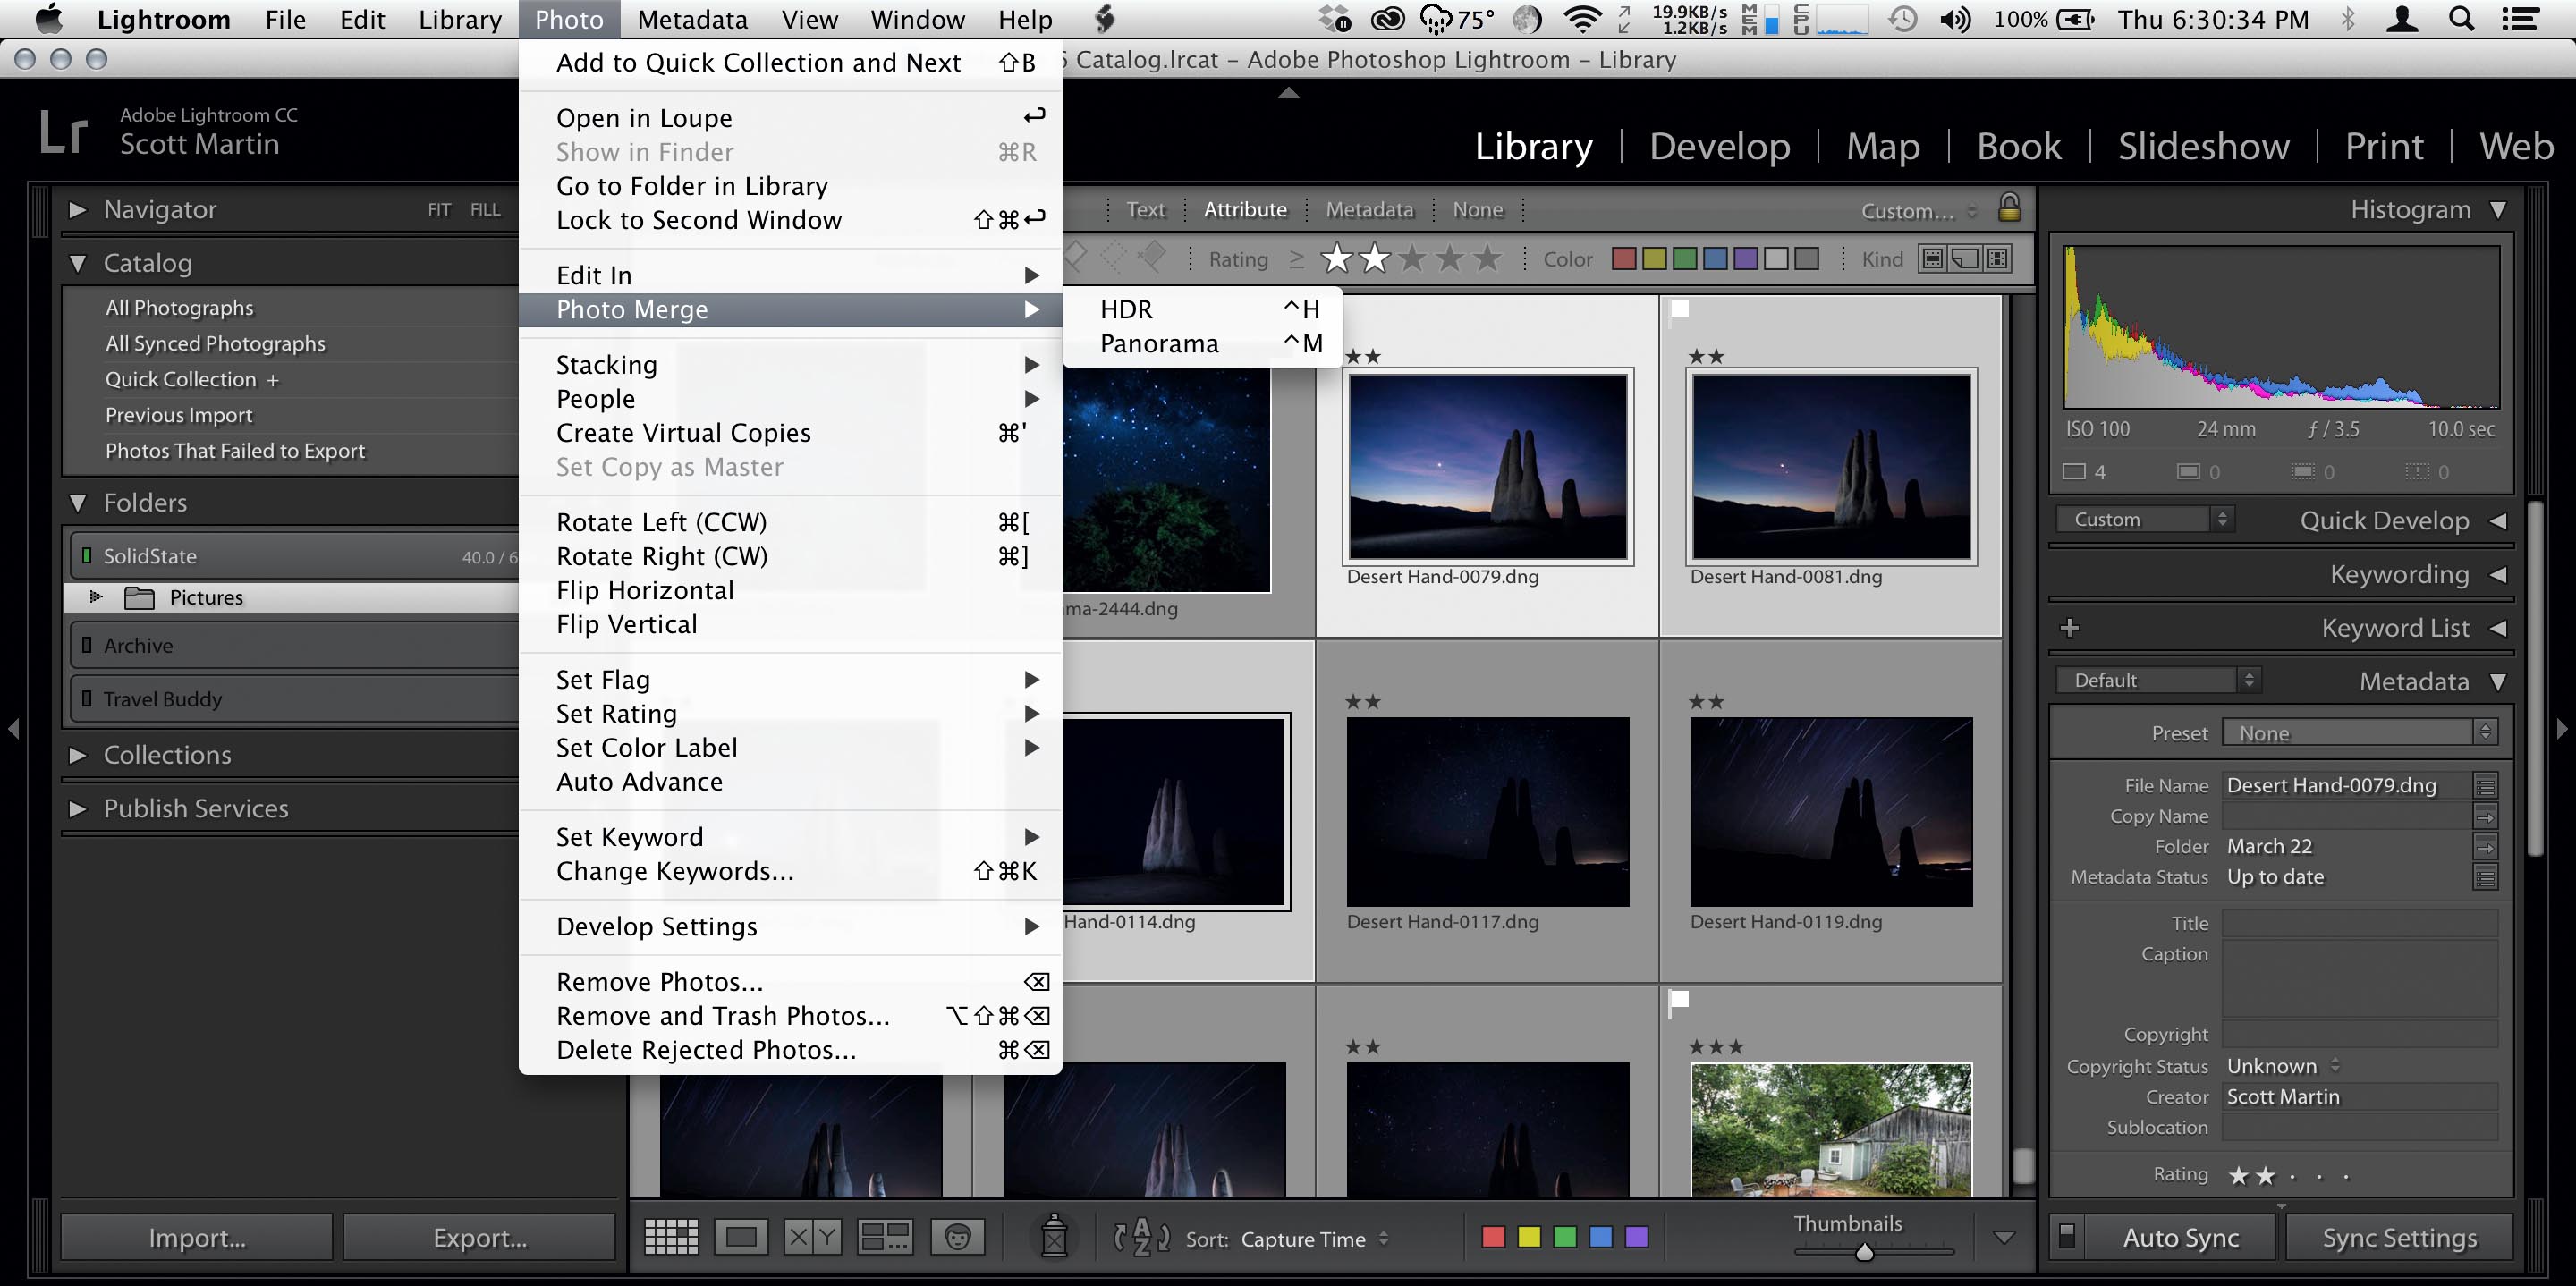
The "Merge to Panorama in Photoshop" and "Merge to HDR in Photoshop" features have both been brought natively to Lightroom. And let me tell you, the process of combining frames in LR6 is so fast, easy and friendly that it'll make you want to do it more often. From the Library module, goto Photo>PhotoMerge to get started. When combining files with Panorama mode, LR6/CC generates a large TIFF, but when combining raw files with HDR, Lightroom generates a much smaller and more potent composite raw file (DNG) instead of a TIFF. These features are super simple, easy to use. They have developed a new architecture for these features that will allow them to do some great things moving forward, but because it's different, your results may vary slightly from what you would get in Photoshop. For now, Lightroom has finally made these tedious tasks insanely easy and have simplified our workflow in the process. Love it.

Facial Recognition
You've likely used another app that uses facial recognition to automatically identify people's faces that you've taken the time to label once. For those that work with portraits, it has the potential to greatly simply the tedious task of including names in metadata. Look for the new "People" view button to get started. It's in the toolbar area of the Library module, next to the Grid, Loupe, Comparison and Survey buttons.

Gradations Brush
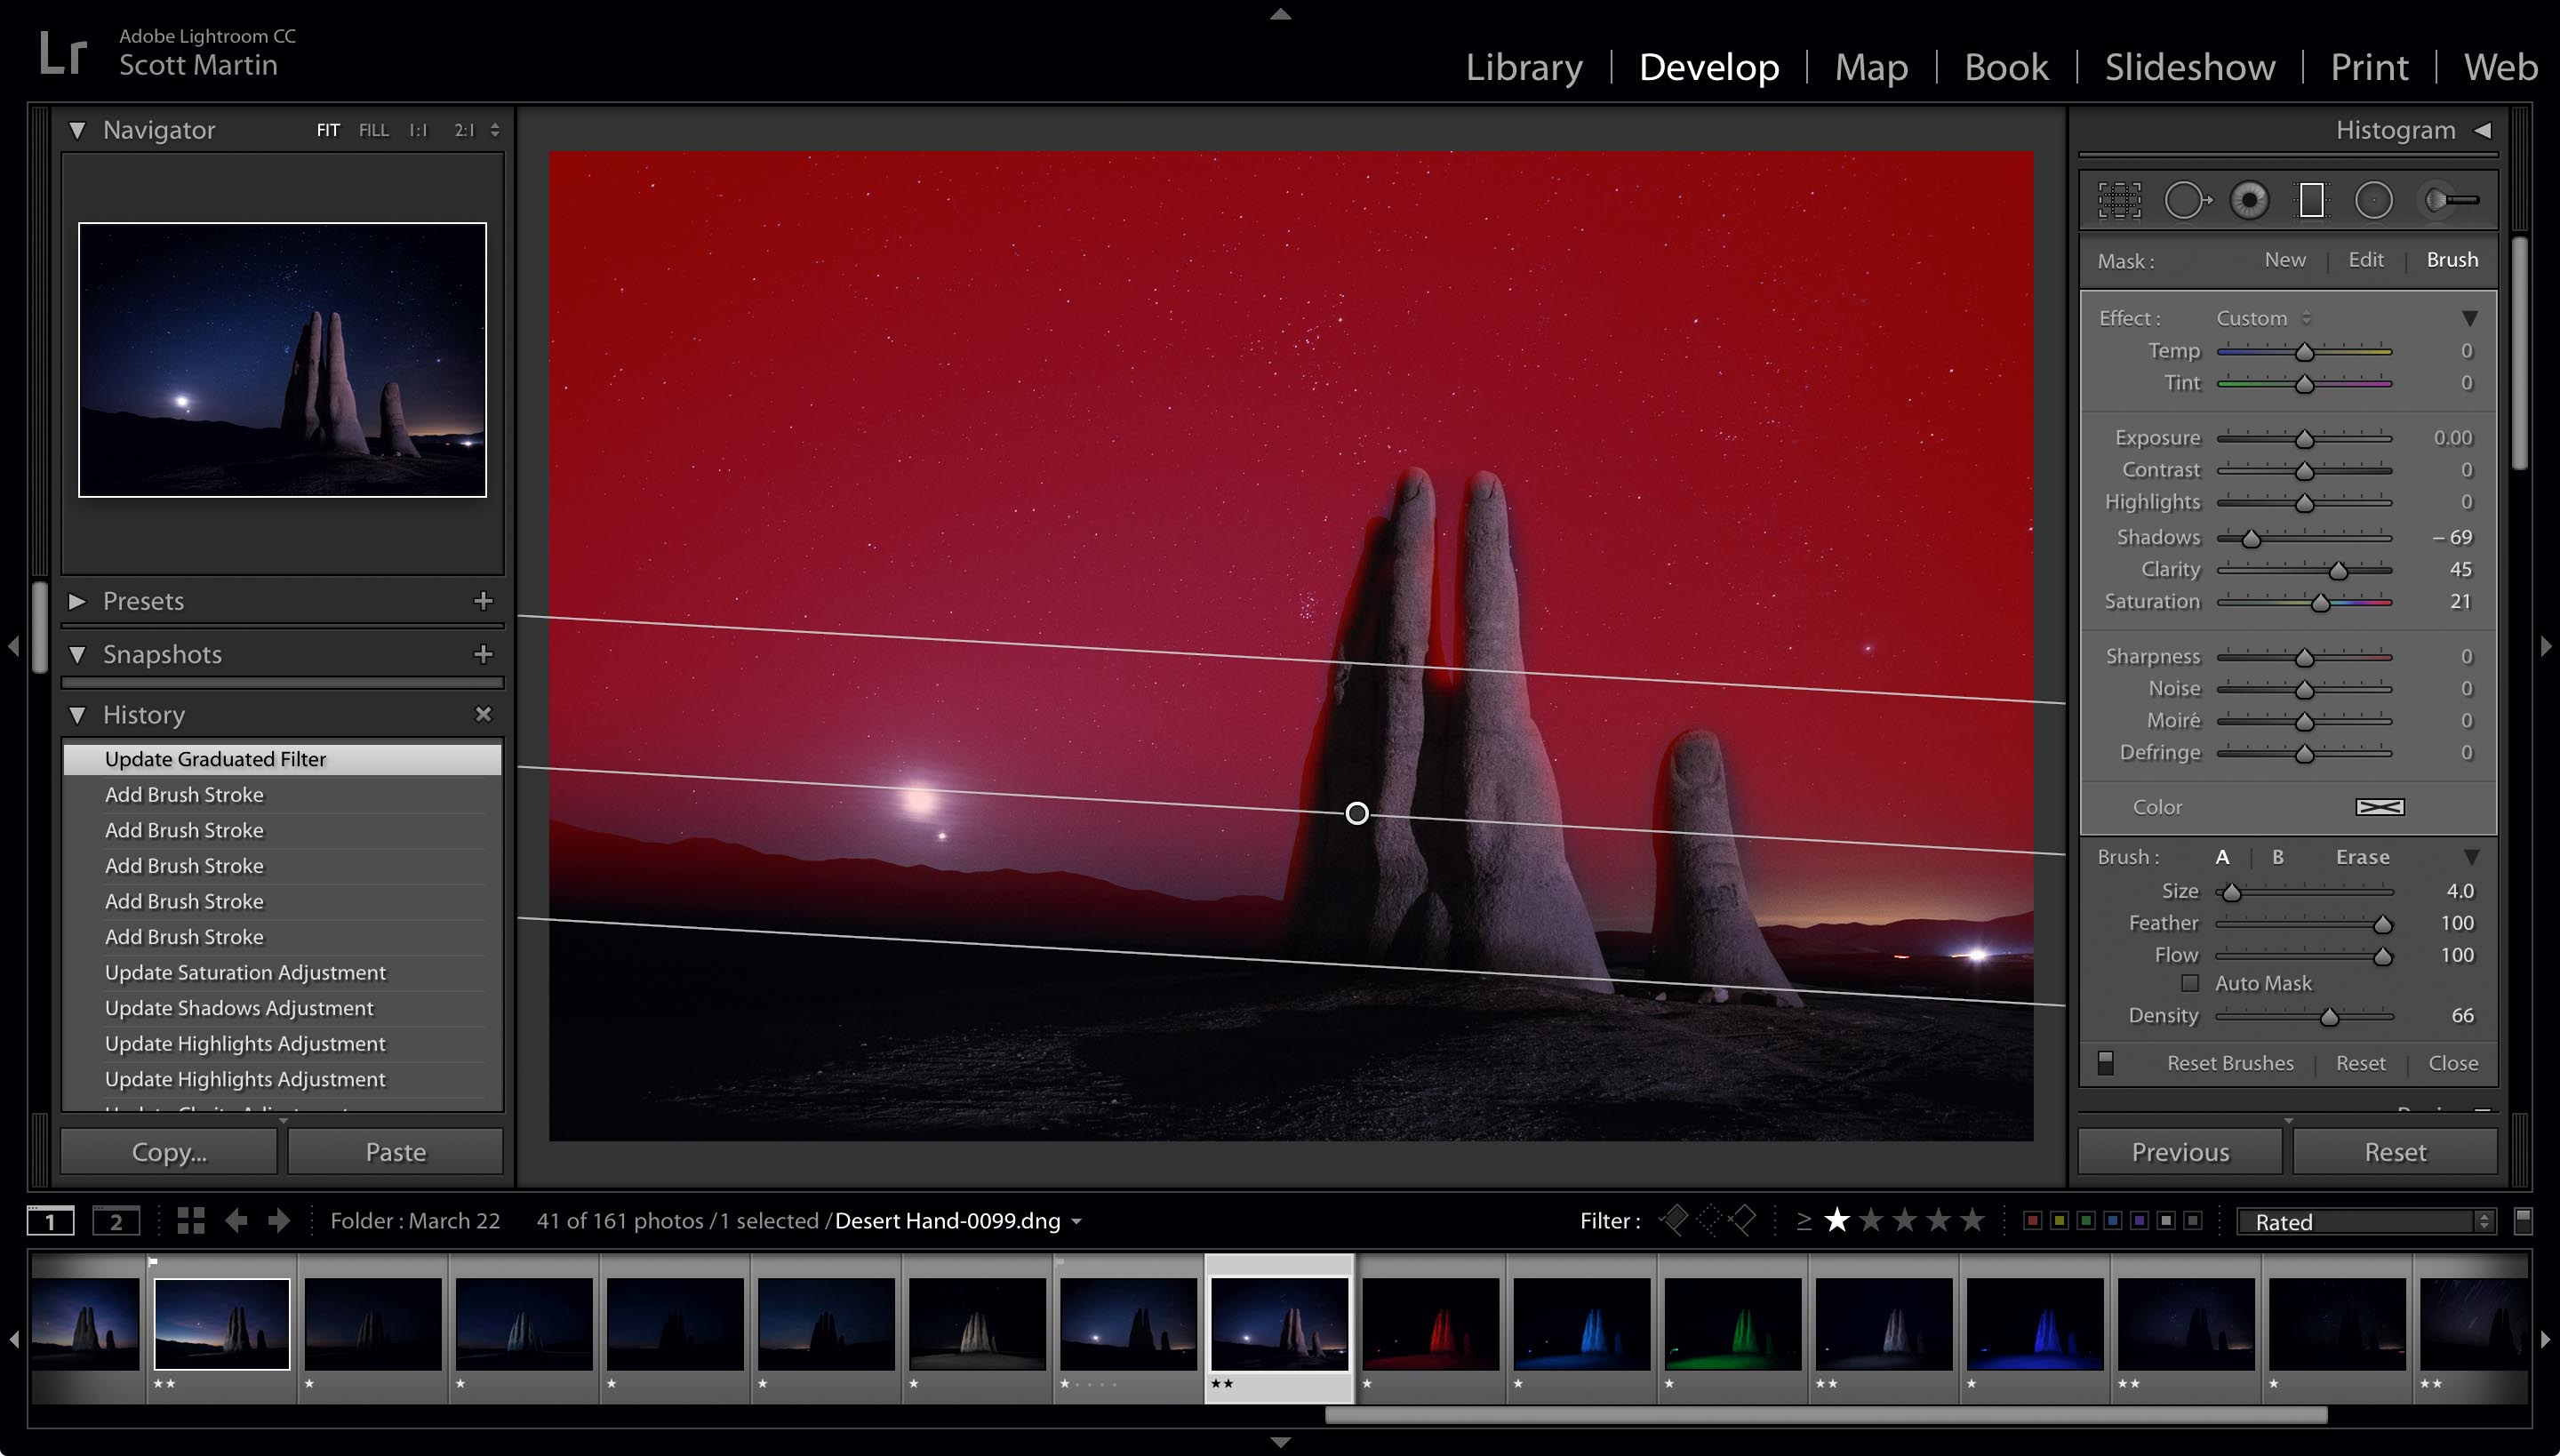
The Gradations tool has always been great for darkening or lightening large portions of the frame – darkening skies for example. Occasionally this doesn't work so well if there's an object that sticks into this portion of the frame – something that sticks up into a sky, for example. LR6/CC now let's us modify a gradation with the new gradation brush. With it you can, for example, brush out the object in the gradation that you don't want to be a part of the gradation.

Performance
Adobe has done a lot of work 'under the hood' that you'll only notice as improved performance. There are too many common tasks to mention, but suffice to say the whole app feels a bit zippier, and your computer's CPU usage will be better maximized. Adobe finally allows for GPU support to speed up the Camera Raw engine, which is big. Look for the new "Performance" tab in the application preferences, and enable your GPU to get this boost.

Import Performance
Pros have noticed that Lightroom's performance importing images has always lagged behind other options (Photo Mechanic, Adobe Bridge, copying files in the Finder, etc) on the Mac. Adobe has done a number of things to address Import performance in LR6/CC but there's a really important trick that you must know about to maximize import performance.
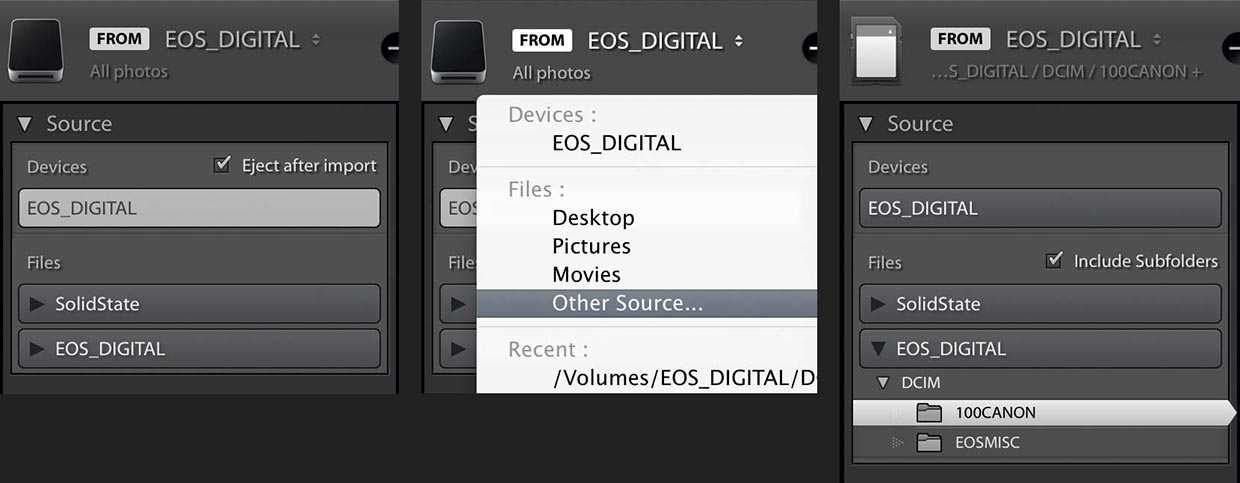
When importing images from a camera card, switch from the default ‘Device’ mode to faster ‘Files’ mode by selecting ‘Other Source…’ from the pop up menu and then your camera card as shown below:
If you select your camera's memory card in this manor you will reduce your import sessions by about 25%. Here are my results from a recent comparison:
Import as Device in LR6/CC 4min 16 seconds
Import as Files in LR6/CC 3min 20 sec
Copy in Finder 3min 10 seconds
The Lightroom team has also done some other smart things to the import process. Importing, preview generation and DNG file conversion are all separate threads that can take place sequentially in the background while you are working on other things. If you like to choose "Copy as DNG" in the Import dialog, Lightroom now imports your proprietary raw files very quickly and works on converting them to DNGs afterwards in the background freeing you up to begin editing or start another import session.
I encourage all my clients to use the "Copy as DNG" option in the Import dialog but understand why so many demanding pros have chosen not do because of the time it used to take to do so. That barrier has now been partially lifted, since it now takes place after import. Lightroom isn't the fastest at converting to the DNG format though; it's 350% slower than the Adobe DNG Converter app, in fact. This will improve when they implement the code to serialize this process, which will hopefully happen soon.
Unfortunately, Lightroom does not allow us to import from multiple camera cards simultaneously. This has been discussed and is something I'm hoping to see in a future release as well.
So Lightroom 6/CC is much faster at importing images! This is huge for my workflow and my favorite thing about LR6/CC (which, I guess, confirms that I'm an efficiency-aholic).
In Conclusion
So those are some of the new things about LR6/CC that I find significant. For a complete list of new features take a look at Adobe’s List of new Lightroom 6/CC features.
I find there's very little learning curve and no reason not to upgrade to LR6/CC. If you are worried that things will look or behave differently – don't. Everything is as it was in LR5, yet its faster, and a few things things have been added should you choose to use them. Onward and upward.

